Have you ever finished a rock tumbling cycle, filled with anticipation, only to open the barrel and find your stones are clean but disappointingly dull? You’re not alone. The secret to achieving that coveted, glass-like, professional shine lies in the final step: the polish. This comprehensive guide is dedicated to what many experts consider the king of rock polishes—aluminum oxide polish. We will dive deep into what it is, how to use it effectively, and how to troubleshoot common issues. This article is worth reading because it will save you time, money, and frustration, helping you turn your rough stones into gleaming gems every single time.
What Exactly is Aluminum Oxide Polish and Why is it the Best for Tumbling?
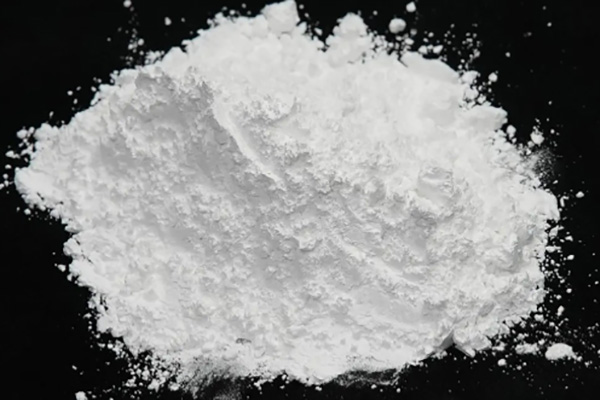
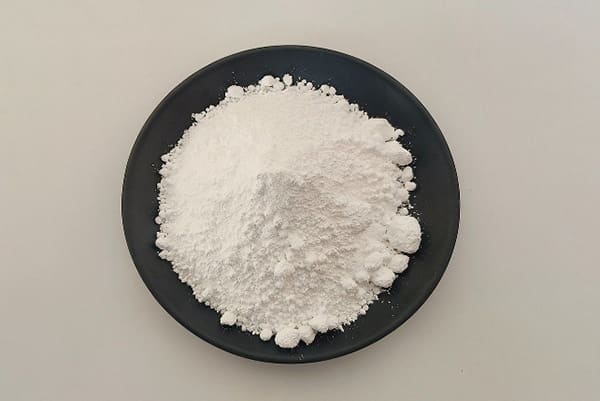
Aluminum oxide polish is an extremely fine abrasive compound, a synthetic mineral with the chemical formula Al₂O₃. In the world of lapidary, it’s celebrated for its hardness and the consistency of its particle size. On the Mohs scale of hardness, it scores a 9, just one step below diamond (which is a 10). This exceptional hardness is precisely why it works so well as a polish. It can effectively smooth and shine a vast majority of common tumbling rocks, like agates, jaspers, and quartzes, which typically have a hardness of around 7. The polish works by removing microscopic scratches left by the previous, coarser grit stages, creating a surface so smooth that it reflects light perfectly, resulting in a brilliant shine.
The reason aluminum oxide polish is often considered the best all-around polish is its versatility and reliability. Unlike some other polishing agents, it’s less prone to causing issues like orange-peel texture or undercutting on softer materials within a mixed batch. The particles in a high-quality aluminum oxide polish are meticulously graded to a specific micron size. A good polish will be in the range of 1 to 3 micron, which is incredibly fine. To put that in perspective, a human hair is about 70 micron thick! This fine consistency ensures a uniform and dazzling result.
Furthermore, its widespread use means it has been tested and refined for decades. From hobbyist kits to professional lapidary shops, aluminum oxide polish is the go-to standard. Its chemical stability and non-reactivity with most stone types make it a safe and predictable choice. When you buy a quality aluminum oxide polish, you are investing in a product proven to deliver exceptional results. While our company’s primary expertise lies in the industrial applications of aluminum, such as creating high-purity aluminium pastes for aerated concrete, the underlying principles of particle science and quality control are universal.
How Do I Get the Best Results from My Aluminum Oxide Polish?
Achieving the perfect shine is more than just throwing some polish in the barrel. It’s a process that demands cleanliness and patience. The single most important rule is to avoid contamination. Even one tiny particle of a coarser grit (like the 60/90 grit from stage 1) in your polish stage can ruin the entire batch, creating scratches and haze.
Here are the essential steps for getting the best result:
- Thorough Cleaning: After your pre-polish stage (typically using a 500 or 1000 grit), you must meticulously clean everything.
- Clean the rocks: Scrub them individually with a toothbrush and soap under running water. Pay close attention to any pits or cracks where old grit might hide.
- Clean the barrel: Disassemble and scrub the barrel, lid, and seal. If you can dedicate one barrel solely for the polish stage, you will see much better results.
- Clean your hands: Wash your hands before handling the clean rocks and polish.
- Use Plastic Pellets: Adding new, clean plastic pellets is crucial. They serve several purposes: they cushion the stones, help carry the polish evenly to all rock surfaces, and add volume to the barrel if needed. Do not reuse pellets from coarser grit stages.
- Run for 5-7 Days: The polishing stage is not a quick one. You should let your tumbler run for at least 5 days, and up to 7 or even 10 for harder materials. This gives the fine aluminum oxide polish enough time to work its magic across every surface.
Patience is your best friend in the final stage. Don’t be tempted to check on it every day. Let the aluminum oxide polish do its work. If you follow these cleaning protocols religiously, you set the stage for a spectacular shine. The quality of your polish matters immensely; a cheap, poorly graded polish will never give you the same mirror-like finish as a premium aluminum oxide polish.
What Grit of Aluminum Oxide Polish Should I Use?
This is a question that can confuse beginners, as "grit" and "polish" are often used interchangeably in the final stage. Technically, a polish is just an extremely fine grit. When you buy a product labeled as "aluminum oxide polish," it is already at the correct fineness. You don’t need to choose a "grit" number for the polish itself. Instead, the quality of the polish is defined by its micron size.
Here’s a breakdown of the typical tumbling stages and their corresponding grit/polish:
| Stage | Purpose | Typical Grit Size | Typical Micron Equivalent |
|---|---|---|---|
| 1 | Coarse Grinding | 60/90 Silicon Carbide | ~200-250 micron |
| 2 | Medium Grinding | 120/220 Silicon Carbide | ~70-120 micron |
| 3 | Fine Grinding / Pre-Polish | 500-600 Silicon Carbide | ~15-30 micron |
| 4 | Polish | Aluminum Oxide Polish | ~1-3 micron |
As you can see, the final polish is orders of magnitude finer than even the pre-polish grit. A high-quality aluminum oxide polish will have a particle size of around 1 micron. Some specialty polishes might go even finer, but for general-purpose tumbling, a 1-3 micron polish is the gold standard. When you are looking to buy a polish, the product description should ideally specify the micron size. If it doesn’t, look for reputable brands known in the lapidary community, like those you might find at a specialty rock shed or a well-regarded online supplier.
The key takeaway is that you don’t select a grit for your polish; you select a high-quality aluminum oxide polish product, which by its nature is an ultra-fine abrasive measured in micron. The preceding steps, using progressively finer grit, are what prepare the rock surface for this final, crucial step.
How Much Polish Do I Actually Need for My Tumbler Barrel?
One of the most common questions from beginners is about the right amount of polish to use. Using too little will be ineffective, while using too much can actually hinder the process and is a waste of a good product. The standard rule of thumb is very similar to the amount of grit you use in the earlier stages.
For a typical 3 lb rotary tumbler barrel, the recommended amount of aluminum oxide polish is:
- 2 to 3 level tablespoons of polish.
If your barrel is 2/3 to 3/4 full of rocks and plastic pellets, this amount is usually perfect. The goal is to create a thin, slurry-like coating that covers everything inside the barrel. You don’t want a thick, pasty mud. A good slurry allows the rocks to slide against each other smoothly, rather than roll and crash. It’s this sliding action that produces the high-quality polish.
For different barrel sizes, you can adjust the amount accordingly:
- 1.5 lb barrel: 1 to 1.5 tablespoons
- 4-5 lb barrel: 4 to 5 tablespoons
- 10-12 lb barrel: 6 to 8 tablespoons
Some people suggest adding a small amount of extra polish after 3-4 days, but this is often unnecessary if you start with the right amount and a clean barrel. If you open the barrel and the slurry seems too thick or dry, you can add a tiny bit more water. If it’s too watery, you can add a little more aluminum oxide polish. The ideal consistency is like a thin gravy. Getting this right is a key part of the learning experience.
Can I Use This Polish on Any Type of Rock?
Aluminum oxide polish is incredibly versatile, making it the workhorse for most rock tumbling hobbyists. It delivers fantastic results on any rock or material with a Mohs hardness of 7 or greater. This includes the most commonly tumbled stones:
- All varieties of Quartz (Agate, Jasper, Chalcedony, Tiger’s Eye, Amethyst)
- Petrified Wood
- Most Feldspars
However, it’s not a one-size-fits-all solution for every single material. For softer stones, typically those with a hardness below 6, aluminum oxide polish can sometimes be too aggressive. It might cause the edges to round too much or fail to produce a sharp shine. For these softer materials, a different type of polish is often recommended.
For example:
- Obsidian and Apache Tears (Hardness ~5-5.5): These are notoriously difficult to polish without bruising or frosting. A cerium oxide polish is often preferred for these.
- Softer Stones like Fluorite or Calcite (Hardness 3-4): These require very gentle tumbling and specialized polishes, often tin oxide or a very fine aluminum oxide polish used in a vibratory tumbler, not a rotary one.
So, while aluminum oxide polish is the champion for the vast majority of your tumbling needs, it’s good to know its limitations. Always identify your rocks before you tumble them. If you have a batch of mixed hardness, the harder stones will polish well, but the softer ones may not. It’s always best to tumble rocks of similar hardness together for the most consistent and beautiful result. The process requires a base level of material knowledge, just as construction requires understanding the properties of materials like lightweight ALC Wallboard.
What Are the 10 Common Mistakes to Avoid When Using Polish?
Even with the best polish, simple mistakes can lead to frustration. I’ve seen it countless times over the years. Here is a checklist of 10 common pitfalls to help you avoid them and ensure a perfect shine every time you tumble.
- Contamination: As mentioned before, this is mistake #1. A single speck of coarse grit will scratch your stones. Always use a dedicated polish barrel or be obsessively clean.
- Not Using Enough Water: The polish needs to form a slurry. Too little water creates a thick paste that cakes on the rocks and prevents them from sliding and polishing.
- Using Too Much Water: This dilutes the polish, making it ineffective. The slurry becomes too thin to properly coat the rocks and pellets.
- Not Running the Polish Stage Long Enough: Patience is a virtue. The polish stage needs a minimum of 5-7 days. Pulling the rocks out after 2 or 3 days will only lead to a hazy, semi-polished finish.
- Tumbling Rocks of Wildly Different Hardness: Hard rocks will grind away at softer rocks, preventing the softer ones from ever taking a good polish. Stick to batches of similar hardness.
- Not Using Plastic Pellets: Pellets are essential. They cushion the stones, prevent chipping, and most importantly, they carry the aluminum oxide polish slurry to every nook and cranny.
- Overfilling the Barrel: An overfilled barrel doesn’t allow for the necessary sliding action. The rocks will just jostle in place. The barrel should be about 2/3 to 3/4 full.
- Using Old, Worn-Out Polish: Aluminum oxide polish doesn’t "go bad," but if a bag is left open, it can become contaminated with dust and debris. Always use fresh, clean polish from a sealed container.
- Skipping the Pre-Polish Stage: You cannot go directly from a medium grit (like 120/220) to a fine polish. The jump is too large. The pre-polish stage (500-600 grit) is critical for removing the scratches from stage 2, setting the stage for the final polish.
- Improper Burnishing: After the polish is done, many people run a final "burnishing" stage with shaved Ivory soap and water for 24 hours. A common mistake here is not cleaning the rocks thoroughly before burnishing. This step cleans the polish off the rocks, it doesn’t add more shine.
Avoiding these simple errors will dramatically improve your results and make the process much more rewarding.
Where Can I Buy High-Quality Aluminum Oxide Polish? A Product Description Guide.
When you’re ready to buy aluminum oxide polish, you’ll find several options, from big online retailers like Amazon to specialized lapidary stores and your local rock shed. The price can vary, but quality should be your primary concern. A cheap, low-quality polish is one of the fastest ways to get a disappointing result.
Here’s what to look for in a good product description:
- Purity and Type: The description should clearly state it is high-purity Aluminum Oxide. Sometimes it’s listed as Alumina.
- Micron Size: This is the most important detail. Look for a polish that is graded to a specific micron size. The best polishes for tumbling are typically 1 micron. If the seller can’t provide this information, it might be a lower-quality, ungraded product.
- Brand Reputation: Look for brands that are well-regarded in the rock tumbling community. Forums and social media groups are a great place to see what experienced hobbyists are using.
- Packaging: Good polish comes in durable, resealable bags or plastic jars to prevent contamination and moisture. A simple plastic bag that isn’t resealable is a red flag.
- Intended Use: The product should be specifically marketed for lapidary or rock tumbling. While aluminum oxide is used in many industries, the particle size and formulation for rock polishing are specific.
"I switched from a cheap kit polish to a quality 1 micron aluminum oxide polish, and the difference was night and day. My agates went from hazy to looking like glass. It’s absolutely worth the slightly higher price." – Quote from a happy hobbyist.
Don’t be swayed by a low price alone. A one-pound bag of high-quality polish will last for many batches and is one of the best investments you can make in your hobby. It’s the difference between frustration and pride in your finished stones.
Aluminum Oxide vs. Cerium Oxide: Which Polish is Right for My Project?
While aluminum oxide polish is the versatile champion, it has a main competitor in the lapidary world: cerium oxide. Understanding the differences will help you choose the right polish for your specific needs. Both are excellent polishes, but they excel in different areas.
Here’s a comparison table to break it down:
| Feature | Aluminum Oxide Polish | Cerium Oxide Polish |
|---|---|---|
| Hardness (Mohs) | 9 | ~6-7 |
| Best For | Harder stones (Hardness 6-9) like Agate, Jasper, Quartz, Petrified Wood. General purpose. | Softer stones (Hardness 5-7) like Obsidian, Opal, Feldspar. Also used for glass. |
| Action | A true mechanical polish; its hardness physically smooths the surface. | A chemo-mechanical polish; it has a chemical reaction with silica, making it very effective on obsidian and glass. |
| Cost | Generally more affordable. | Typically more expensive. |
| Common Issues | Can be too aggressive on very soft stones. | Can cause "orange peel" texture on some agates if not used correctly. Less effective on very hard stones. |
The main takeaway is this: If you are tumbling mixed hard rocks like quartz and jasper, aluminum oxide polish is your best bet. It’s reliable, cost-effective, and produces a fantastic shine. You would choose cerium oxide for specialty projects, particularly if you’re working with obsidian or want to polish glass. Many serious hobbyists keep a bag of each on hand. For a beginner putting together their first tumbling kit, starting with a high-quality aluminum oxide polish is the most sensible choice. It will successfully polish the vast majority of stones you’re likely to find or buy.
Think of it like choosing the right tool for a job. You wouldn’t use a sledgehammer for delicate work. Similarly, you should use the right type of polish for your specific stone material.
What Can I Do if My Rocks Aren’t Getting a Good Shine?
It’s the moment of truth. You’ve run the polish stage for a week, you open the barrel, and… meh. The rocks are dull, hazy, or even have a satin finish. Don’t despair! This is a solvable problem. The first step is to diagnose the cause.
Here’s a troubleshooting checklist:
- Check for Contamination: This is the #1 culprit. Dry a few rocks and inspect them under a bright light or magnifying glass. Can you see tiny scratches? If so, you almost certainly had grit contamination. Solution: You have to go back. Thoroughly clean everything and re-run the pre-polish stage (500 grit) and then the polish stage again. It’s a pain, but it’s the only way.
- Did You Use Enough Time and Good Media? Was the polish stage run for at least 5-7 days? Did you use clean plastic pellets to cushion the stones and carry the polish? Solution: If you only ran it for a few days, just re-run the polish stage for longer. If you didn’t use pellets, add some and run the polish stage again.
- Are the Rocks Suitable for a High Polish? Some rocks, like sandstone or certain types of granite, are too porous or soft to ever take a glassy shine. They will look clean and smooth, but never glossy. Solution: Research the type of rock you’re tumbling. This is a case of managing expectations.
- Is Your Polish High Quality? If you’ve done everything else right, your aluminum oxide polish might be the problem. A low-quality, poorly graded polish simply doesn’t have the right micron particle size to do the job. Solution: Invest in a better product from a reputable supplier. Buy a polish that is specifically graded to 1 micron.
- Did You Complete the Burnishing Step? Sometimes a slight haze is just leftover polish residue. Solution: After cleaning the rocks from the polish slurry, run them for 24 hours with just water and shaved Ivory soap or borax. This final cleaning can make a surprising difference.
Troubleshooting is part of the learning process. My first few batches were far from perfect. But by carefully reviewing my steps and using a quality aluminum oxide polish, I was eventually able to get that incredible, professional shine.
How Can I Get Help if I Have an Issue with a Product?
When you buy a product like aluminum oxide polish, especially from a specialized retailer, good customer support can be a lifesaver. If you’ve followed all the steps and are still not getting the desired result, it’s time to reach out for help. Reputable suppliers, whether it’s a dedicated rock shed or a well-known online store, want you to be successful.
Here’s how to effectively get help:
- Be Prepared with Details: Before you call or email, have your information ready. What type of tumbler do you have? What kind of rocks are you tumbling? What were all the grit stages you used? How long did you run each step? How much polish did you use? The more detail you can provide, the easier it will be for them to diagnose the issue.
- Take Photos: A picture is worth a thousand words. Take clear, well-lit photos of your hazy rocks. This can instantly show an expert what might be wrong, whether it’s scratching from contamination or a texture issue from the wrong type of polish.
- Consult Community Resources: Online forums (like the one at Rock Tumbling Hobby) and Facebook groups are filled with experienced people who are often happy to offer advice. Post your photos and your process, and you’ll likely get several helpful suggestions.
- Contact the Seller Directly: If you suspect an issue with the polish itself, contact the seller. They can confirm the product specifications (like micron size) and may offer a replacement or refund if the product is faulty. While our expertise is in B2B service for construction materials, the principle of strong customer support is universal and something we prioritize at our Professional Water-based Aluminum Powder Slurry Factory.
Don’t be afraid to ask for help. The rock tumbling community is generally very friendly and supportive. We all started somewhere, and we all want to see each other succeed in creating beautiful, polished stones.
Key Takeaways for a Perfect Polish
To close, here is a summary of the most important things to remember on your journey to a perfect, mirror-like shine with aluminum oxide polish:
- Cleanliness is Everything: Your number one priority must be to prevent contamination from coarser grit. Use a dedicated barrel for polishing or be incredibly thorough in your cleaning.
- Quality Over Price: Invest in a high-quality, 1 micron graded aluminum oxide polish. It is the single most important factor in achieving a glass-like shine.
- Patience is a Virtue: The polishing stage is a marathon, not a sprint. You must run your tumbler for at least 5-7 days for the best results.
- Use the Right Polish for the Job: Aluminum oxide polish is the best all-around choice for hard stones like agate and jasper. For softer materials like obsidian, consider cerium oxide.
- Don’t Skip Steps: The pre-polish stage is not optional. You must follow the four-stage process (coarse, medium, pre-polish, polish) to properly prepare the stone surface.
- Use Plastic Pellets: They are essential for cushioning the rocks and ensuring the polish is evenly distributed.
Post time: 6 月-10-2025